Introduction to Healthy Twix Cups
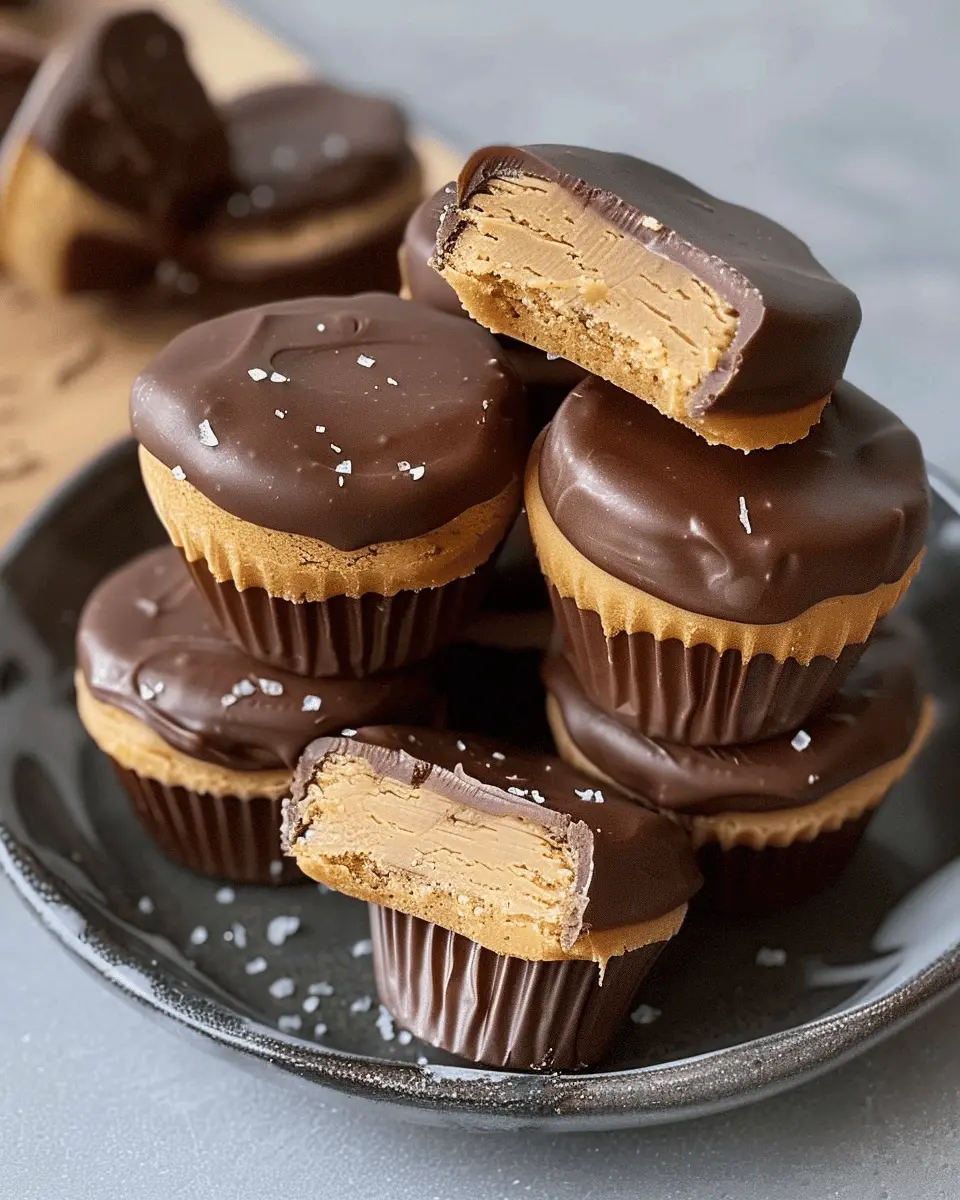
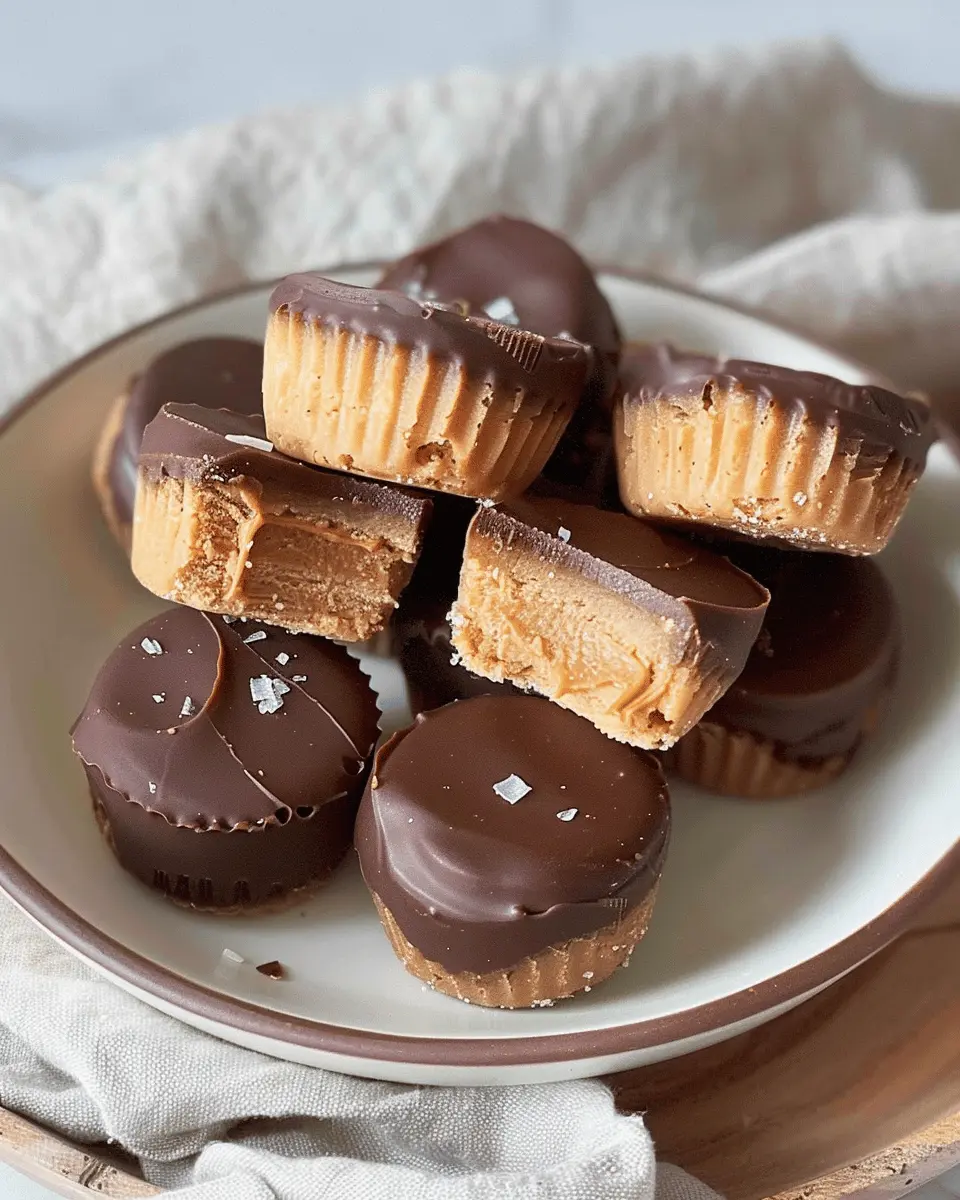
Who doesn’t love a sweet treat that feels indulgent but is packed with wholesome ingredients? Enter Healthy Twix Cups! These delightful little bites are not just a healthier version of a classic candy bar; they’re a guilt-free way to satisfy your sweet tooth while keeping your dietary goals in check.
Why Healthy Twix Cups Are the Perfect Treat for Young Professionals
As a busy young professional juggling deadlines, meetings, and countless tasks, finding a snack that fuels your body and keeps you energized can feel like a daunting task. Healthy Twix Cups are the ideal solution. They combine delicious flavors with nutritious ingredients, making them a great on-the-go snack.
-
Nutrient-Dense Ingredients: Instead of refined sugars and unhealthy fats, these treats use wholesome alternatives like natural nut butters, dates, and dark chocolate. This not only enhances the flavor but also provides essential nutrients, often lacking in traditional sweets.
-
Quick to Prepare: With minimal prep time required, you’ll spend less time in the kitchen and more time focusing on what you love. Plus, you can easily make a batch over the weekend to keep your snack game strong throughout the week.
-
Versatile Recipe: Feel free to get creative! You can customize your Healthy Twix Cups based on your dietary preferences—yes, they’re vegan! Whether you’re looking to avoid gluten or are simply trying to reduce sugar, the options are endless.
Did you know that almost 70% of young professionals feel more productive when they indulge in healthier snacks? This adds weight to the argument that nutritious options like Healthy Twix Cups can enhance your energy levels and maintain focus.
Now, I’m not saying you’ll immediately feel like you can conquer the world after just one bite, but these tasty treats can definitely help you stay on track!
For those looking for more information on healthy eating habits, Harvard Health Publishing is a fantastic resource full of evidence-based insights.
So why wait? Let’s dive into this delicious recipe and bring a bit of indulgence into your busy life without the guilt!

Ingredients for Healthy Twix Cups
Creating Healthy Twix Cups is an enjoyable endeavor that transforms your favorite indulgence into a guilt-free treat. Let’s break down what you need for this delicious recipe!
Base Ingredients
The base for these cups is foundational, combining wholesome elements that deliver both flavor and nutrition. Gather the following:
- Oats: A great source of fiber that keeps you full longer.
- Nut Butter: Choose almond or peanut butter for that creamy texture.
- Maple Syrup: A natural sweetener that adds a touch of sweetness without the refined sugar.
Caramel Layer Ingredients
Next comes that luscious caramel layer, which really makes these Healthy Twix Cups stand out. You’ll need:
- Dates: Nature’s candy! Soaked to blend smoothly.
- Coconut Milk: Adds creaminess and a hint of tropical flavor.
- Vanilla Extract: For a warm aroma that enhances the dish.
Chocolate Topping Ingredients
Finally, let’s wrap it all up with a rich chocolate topping. It’s simpler than you think:
- Dark Chocolate: Opt for dairy-free options for a vegan-friendly choice.
- Coconut Oil: Helps the chocolate melt smoothly and set perfectly.
With these ingredients in hand, you’re ready to whip up your Healthy Twix Cups! Curious about the benefits of oats? Check out this Nutrition article for more insights!
Step-by-Step Preparation of Healthy Twix Cups
Creating delicious and guilt-free Healthy Twix Cups at home can be both fun and rewarding. When you’re craving a sweet treat but want to stick with your health goals, these vegan cups are the perfect solution. Let’s dive into the step-by-step preparation that will have you enjoying these delightful snacks in no time.
Gather Your Equipment
Before we jump into the cooking process, it’s essential to set yourself up for success by gathering the right tools. Here’s what you’ll need:
- Mixing bowls: For combining your ingredients.
- A food processor: This is ideal for making your base and caramel layer smooth and creamy.
- Silicone cupcake molds or a muffin tin lined with paper cups: This will help you shape your Healthy Twix Cups.
- Melting pot or microwave-safe bowl: For melting chocolate.
- Spatula: For easy mixing and transferring.
- Refrigerator: To chill and set your delightful cups.
Once you have everything in place, you’re ready to tackle the next step!
Make the Base
The base of your Healthy Twix Cups is essential for creating that satisfying crunch reminiscent of the original treat. Let’s get started:
- Ingredients: Gather your base ingredients: dates, almonds, and a pinch of sea salt.
- Blend: Add the dates and almonds to your food processor and blend until you have a sticky mixture. If it’s too dry, you can add a teaspoon of water or non-dairy milk to help it blend smoothly.
- Press: Once your mixture is ready, distribute it evenly into the bottom of your silicone molds. Press it down firmly to create a solid base.
This step sets the stage for your Healthy Twix Cups, providing a nutty foundation filled with nutrients.
Prepare the Caramel Layer
What’s a Healthy Twix Cup without that gooey caramel layer? While traditional caramel can be packed with sugar, our vegan version is guilt-free yet delicious:
- Ingredients: Grab some medjool dates, almond butter, vanilla extract, and a dash of sea salt.
- Blend: In your food processor, combine the medjool dates, almond butter, vanilla extract, and sea salt. Blend until smooth and creamy; this should take about 2-3 minutes.
- Layer: Once blended, spoon the caramel mixture onto your base layer. Spread it evenly, ensuring it covers all the bases nicely. This is where the magic happens!
The combination of flavors here is simply divine. Other variations can include adding coconut sugar for extra sweetness or experimenting with different nut butters.
Add the Chocolate Topping
Next, we’re adding that delicious chocolate layer to satisfy your sweet tooth:
- Ingredients: You’ll need dark chocolate chips (make sure they are dairy-free), and a bit of coconut oil to help with melting.
- Melt: If using a microwave, heat the chocolate and coconut oil together in 30-second bursts until fully melted. Alternatively, you can melt it on the stovetop using a double boiler.
- Drizzle: Once melted, carefully pour the chocolate over the caramel layer in each cupcake mold. You can use a spatula to spread it evenly, creating a smooth top.
This layer is what truly elevates the Healthy Twix Cups, giving them that signature look and taste.
Chill and Set
At this point, your Healthy Twix Cups are almost complete! The final step is to give them time to set:
- Chill: Place your filled molds in the refrigerator for at least 2 hours or until completely firm. This will ensure the layers hold together nicely.
- Enjoy: Once they are set, gently remove the cups from the molds. Enjoy them immediately or store them in an airtight container in the fridge for later.
These Healthy Twix Cups are not only a delightful indulgence but also a nutritious snack option. When you’re feeling a craving coming on, reach for these instead of that candy bar. They’re a fantastic way to enjoy a treat without the guilt.
Now that you’re all set to create your own Healthy Twix Cups, why not share your creations with friends or on social media? Happy cooking!

Variations on Healthy Twix Cups
Creating a deliciously healthy twist on classic favorites doesn’t have to end with the original recipe. Explore these delightful variations on your Healthy Twix Cups to keep snack time fun and flavorful!
Nut-Free Twix Cups
For those with nut allergies, fear not! You can still indulge in these sweet treats. Substitute the standard nut butter with alternatives like sunflower seed butter or pumpkin seed butter. These options not only maintain that creamy texture but also give your Healthy Twix Cups an enticingly unique flavor. Just make sure your ingredients are free from cross-contamination!
Vegan Healthy Twix Cups
If you’re on a plant-based journey, these Healthy Twix Cups cater to your needs beautifully. The base layer can be made with dates, oats, and a plant-based butter. You can even replace almond milk with coconut or oat milk to keep it fully vegan. By using dark chocolate that’s dairy-free, you won’t miss out on the rich satisfaction that chocolate provides. Adaptation can be delicious!
Flavor Variations
Are you feeling adventurous? Play around with flavors to elevate your Healthy Twix Cups:
- Coconut Twist: Add shredded coconut to your caramel layer for a tropical flair.
- Minty Fresh: Mix peppermint extract into the chocolate for a refreshing mint twist.
- Spiced Delight: Incorporate a pinch of cinnamon or nutmeg to warm up the flavors.
Experimenting with different flavors might lead you to your new favorite snack. Who knows, a simple switch could surprise your taste buds!
For even more inspiration on healthy alternatives, check out this comprehensive guide to ingredient substitutions. Happy snacking!
Cooking Tips and Notes for Healthy Twix Cups
Ingredient Substitutions
Creating your own Healthy Twix Cups can be a fun experiment in the kitchen! If you’re out of an ingredient, don’t worry—there are plenty of swaps you can make.
- Nut Butters: Swap almond butter for peanut butter based on your preference or allergy concerns.
- Sweeteners: Instead of maple syrup, try agave nectar or date syrup for a different flavor profile.
- Chocolate Options: Use dairy-free chocolate chips or even cacao powder for a richer chocolate taste—just remember to adjust the recipe for sweetness!
Baking Techniques and Tricks
When it comes to making Healthy Twix Cups, your techniques can make a big difference.
- Layering: Make sure each layer is fully cooled before adding the next. This helps maintain distinct textures—crunchy base, creamy filling, and a satisfying chocolate shell.
- Chilling Time: Refrigerate between layers. This quick chilling step will help each layer set nicely, ensuring your cups hold their shape.
- Melting Chocolate: For ultimate shine and texture, melt your chocolate in a double boiler. This method prevents burning and keeps everything smooth.
For more baking tips, check out King Arthur Baking for expert advice! Enjoy your cooking adventure with these Healthy Twix Cups!
Serving Suggestions for Healthy Twix Cups
Pairing with Fresh Fruits
To elevate your Healthy Twix Cups, consider serving them alongside a vibrant assortment of fresh fruits. Think juicy strawberries, refreshing watermelon, or crisp apple slices — their natural sweetness creates a delightful contrast with the rich, creamy layers of the cups. Not only do fruits add color to your plate, but they also offer essential vitamins and minerals that boost your overall health. For a fun twist, you could even try dipping the fruits in a bit of melted dark chocolate to enhance that indulgent feel!
Perfect Drink Pairings
When it comes to beverages, you have plenty of options that complement your Healthy Twix Cups. A chilled glass of almond milk or coconut milk can beautifully balance the rich flavors. Looking for something zesty? Try a refreshing herbal iced tea, such as mint or hibiscus, which not only hydrates but also adds a unique flavor dimension. If you want a fun twist, consider making a smoothie with spinach, banana, and a touch of coconut water — the creaminess pairs unexpectedly well with your delicious cups!
For more details on healthy pairings, check out Healthline for extensive nutritional tips. Just remember, these serving suggestions aren’t just for looks; they make your dessert more satisfying and nutritious!
Time Breakdown for Healthy Twix Cups
When you’re diving into the delightful world of Healthy Twix Cups, it’s helpful to get a clear picture of the time commitment involved. Here’s a handy breakdown to streamline your baking experience.
Preparation Time
Getting ready for your Healthy Twix Cups adventures will take about 15 minutes. This includes measuring out all your ingredients and prepping the layers, so you’re all set to go.
Cooking Time
The actual cooking time is minimal — only about 10 minutes. During this stage, you’ll be melting and mixing that delicious base that forms the foundation of your treats.
Chill Time
The most important part is the chill time, which lasts about 1 hour. This is where the magic happens as your cups firm up in the fridge. Patience is key! You’ll want those layers to set perfectly for that ultimate crunch.
By organizing your time effectively, you’ll find that creating these Healthy Twix Cups is not only easy but also incredibly rewarding. Check out more tips on meal prepping at EatingWell for additional inspiration!
Nutritional Facts for Healthy Twix Cups
Calories and Macronutrients
When it comes to enjoying delicious treats like Healthy Twix Cups, knowing what you’re consuming is essential. These delightful cups typically contain around 150 calories each. In terms of macronutrients, you’re looking at approximately:
- Protein: 3g
- Carbohydrates: 20g
- Fat: 7g
These values can vary based on your ingredient choices — like using almond butter or peanut butter for that creaminess without the guilt. If you’re curious about specific ingredients, you might want to explore resources like the USDA Nutritional Database to see how they fit into your daily goals.
Additional Nutritional Benefits
Aside from being a tasty indulgence, Healthy Twix Cups are packed with nutritional perks. They typically include nutrient-dense ingredients like:
- Nuts: Great sources of healthy fats and protein that can help with satiation.
- Dates: Natural sweeteners that provide fiber and essential vitamins.
- Dark chocolate: Rich in antioxidants, which can aid in reducing inflammation.
When aiming for a balanced diet, treating yourself doesn’t have to mean sacrificing health. Plus, experimenting with flavors and textures can make healthy eating a pleasure! Are you ready to satisfy your cravings without the guilt? For more detailed nutrition guides, you might find Healthline’s article on healthy fats insightful.
FAQs about Healthy Twix Cups
Can I make these ahead of time?
Absolutely! Healthy Twix Cups are perfect for meal prepping or if you want to whip up a batch for a special occasion. Just prepare them as directed, and once they’ve set, you can store them in the fridge for up to a week. This makes them a fantastic quick snack when those chocolate cravings strike!
How should I store Healthy Twix Cups?
To keep your Healthy Twix Cups fresh, store them in an airtight container in the refrigerator. If you need to keep them for a longer time, consider freezing them. Just make sure to separate the cups with parchment paper to prevent sticking. Thaw them in the fridge when you’re ready to enjoy!
What are some common mistakes to avoid?
Making Healthy Twix Cups is simple, but even the best can run into a snag. Here are a few tips to ensure success:
-
Don’t skip the chilling time: Allow each layer to set properly before adding the next. Rushing this can lead to a gooey mess.
-
Use the right ingredients: Make sure your vegan chocolate is indeed dairy-free, and don’t substitute with standard chocolate if you’re looking for a healthier option.
-
Measure accurately: Accurate measurements, especially for the crust and caramel, can make a big difference in taste and texture.
If you encounter any issues or have more questions while making your Healthy Twix Cups, check out resources like Nutrition Data for more insights or join cooking forums where you can share experiences with fellow food enthusiasts!
Always remember: everyone’s kitchen journey is an opportunity to learn and improve. Happy cooking!
Conclusion on Healthy Twix Cups
Why You Should Try Making Them Today
If you’re searching for a delicious yet guilt-free treat, look no further than these Healthy Twix Cups! They not only satisfy your sweet tooth but are also packed with nutritious ingredients that support a balanced lifestyle. Imagine biting into that crunchy layer of nut butter and dark chocolate while knowing you’re indulging in something wholesome.
With very minimal prep time, you can whip up these cups anytime! They make for a perfect snack or dessert when you’re hosting friends or simply treating yourself after a long day. Plus, making them at home lets you control the ingredients—highlighting freshness and quality.
So, why not gather your favorite ingredients and make your own Healthy Twix Cups today? Who knows? They might just become your new go-to for satisfying those sweet cravings with a healthy twist! For more inspiration, check out Nutrition.gov for ideas on healthy eating.
Print
Healthy Twix Cups: Indulgent Vegan Treats for Every Sweet Tooth
- Total Time: 45 minutes
- Yield: 12 cups 1x
- Diet: Vegan
Description
Enjoy these delicious and healthy vegan treats that satisfy your sweet tooth without compromising on health.
Ingredients
- 1 cup almond flour
- 1/4 cup maple syrup
- 1/4 cup coconut oil
- 1/2 cup medjool dates, pitted
- 1/4 cup almond butter
- 1/4 cup cacao powder
- 1/2 cup vegan chocolate chips
Instructions
- In a mixing bowl, combine almond flour, maple syrup, and coconut oil until well blended.
- Press the mixture into the bottom of a lined muffin tin to form the base.
- Blend medjool dates, almond butter, and cacao powder until smooth and spread this over the base.
- Melt the vegan chocolate chips and drizzle over the top layer.
- Chill in the refrigerator for at least 30 minutes until set before serving.
Notes
- Great for meal prep and can be made in advance.
- Feel free to add nuts or seeds for extra crunch.
- Prep Time: 15 minutes
- Cook Time: 0 minutes
- Category: Desserts
- Method: No-bake
- Cuisine: Vegan
Nutrition
- Serving Size: 1 cup
- Calories: 120
- Sugar: 8g
- Sodium: 5mg
- Fat: 9g
- Saturated Fat: 5g
- Unsaturated Fat: 4g
- Trans Fat: 0g
- Carbohydrates: 12g
- Fiber: 2g
- Protein: 3g
- Cholesterol: 0mg
Keywords: Healthy Twix Cups, Vegan, Desserts, Healthy Treats