Introduction to Earthquake Cake Recipe
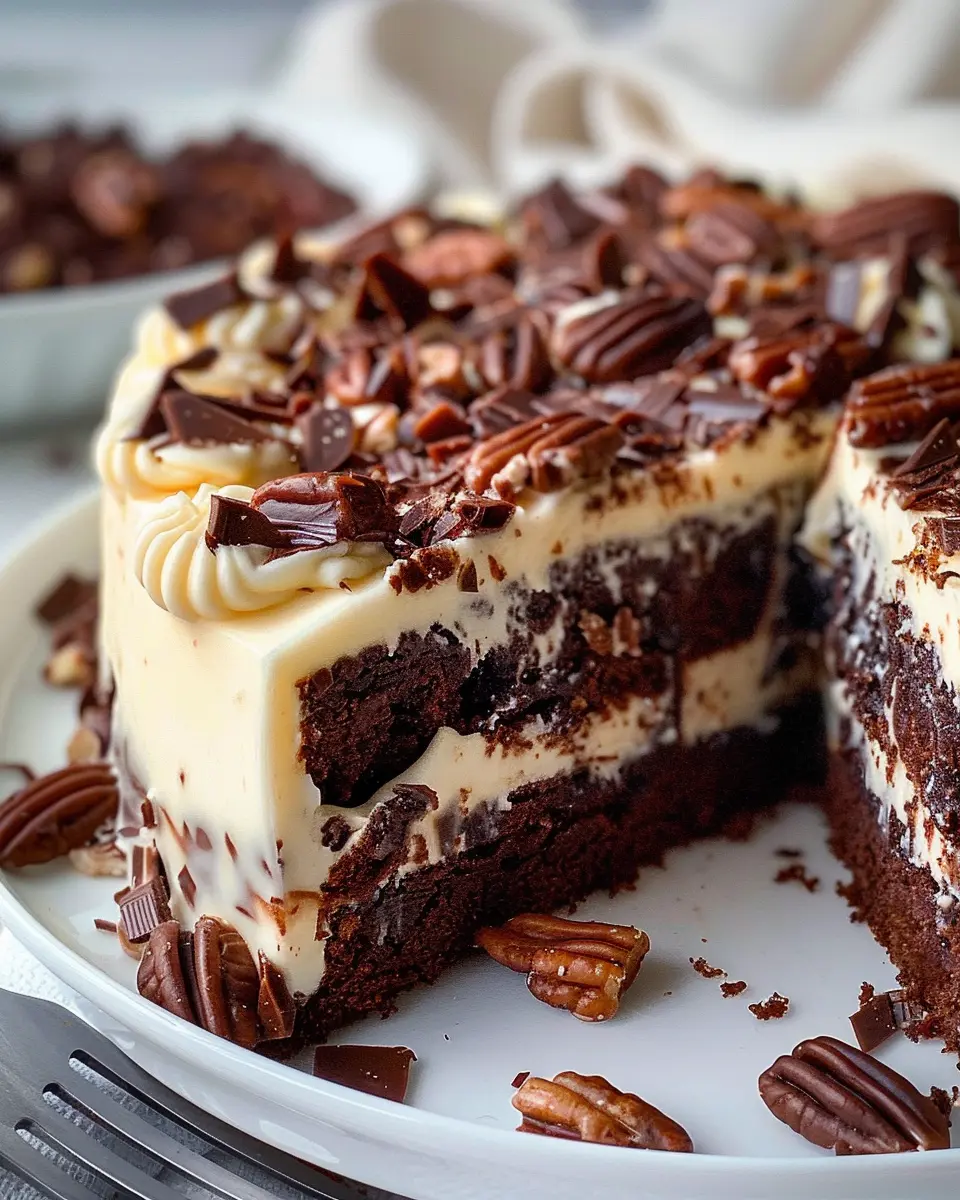
If you’ve never tried an earthquake cake, you’re in for a delightful surprise! This decadent dessert combines the warmth of chocolate, the creaminess of cream cheese, and a rich blend of toppings that makes it hard to resist. But what truly makes this dish shine is its unique presentation—when baked, it forms cracks resembling the aftermath of a seismic event, hence the name. The earthquake cake recipe is not just a treat for the taste buds; it’s a visual spectacle that often leaves everyone guessing how you achieved that gorgeous, craggy finish!
Why is Earthquake Cake a crowd favorite?
Earthquake cake has swiftly ascended to become a beloved dessert at gatherings. Why, you ask? Here are a few reasons that have people passionate about this dish:
-
Easy to Make: The earthquake cake recipe is uncomplicated. With just a few ingredients, you can whip up this delightful treat in no time. Perfect for those busy weeknights or spur-of-the-moment dinner parties!
-
Versatile Toppings: You have the flexibility to customize your cake with your personal favorite toppings. Whether you prefer a mix of nuts, shredded coconut, or even funky candies, the sky’s the limit.
-
Rich Flavor Profile: The combination of chocolate cake mix paired with cream cheese creates an indulgent, rich flavor that both kids and adults can enjoy. Plus, who doesn’t love a cake that tastes this good without requiring hours in the kitchen?
-
Eye-Catching Presentation: The cracks and fissures make it visually intriguing. You might find guests diving in and asking how you achieved such a stunning cake, giving you perfect bragging rights!
Additionally, consider checking out sources like The Spruce Eats for further cake inspiration or Serious Eats for tips on baking techniques to elevate your cake-making skills.
In summary, making an earthquake cake is as much about the experience as it is about the final product. So, roll up your sleeves, and let’s dive into creating a cake that’s sure to be the star of your next gathering!
Ingredients for Earthquake Cake
Essential ingredients for the perfect Earthquake Cake
To whip up a delicious Earthquake Cake, you’ll need a few essential ingredients that come together to create that signature “earthquake” look and taste. Here’s your shopping list:
- Chocolate cake mix: The foundation of our Earthquake Cake, providing rich flavor.
- Eggs: Adding moisture and richness to the mix.
- Cream cheese: This is what gives your cake its distinctive texture and flavor—don’t skimp on this!
- Powdered sugar: For that sweet creamy layer; it pairs beautifully with cream cheese.
- Chopped nuts: Walnuts or pecans add crunch and depth.
- Chocolate chips: Because who doesn’t love a little extra chocolate?
Optional add-ins for personalization
Feel free to get creative with your earthquake cake recipe! Consider adding these optional ingredients to tailor the cake to your taste:
- Turkey bacon bits: For a smoky twist.
- Chicken ham: Adds a nice savory element.
- Beef jerky: For those who enjoy a heartier flavor profile.
- Fruits like cherries or even crushed pineapple: For a burst of freshness.
With a little personalization, your Earthquake Cake can become a truly unique masterpiece! For more inspiration, check out this guide on flavor pairings to elevate your dessert game. Happy baking!
Step-by-step Preparation of Earthquake Cake
Baking an Earthquake Cake is more than just mixing ingredients—it’s an experience full of delightful layers and textures. This unique cake, featuring coconut, pecans, and a rich chocolate batter, comes together smoothly with a few simple steps. Grab your apron, and let’s dive in!
Preheat your oven and prepare the baking dish
To kick things off, you’ll want to preheat your oven to 350°F (175°C). Preheating ensures that your cake bakes evenly, giving you that perfectly fluffy texture. While the oven warms up, prepare your baking dish. A 9×13-inch glass or metal pan works best for this recipe.
- Grease the pan: Use cooking spray or a bit of butter to coat the bottom and sides of the pan. This will prevent the cake from sticking, making it easier to serve later.
- Optional: If you want a little extra flavor, consider lining the bottom with a sheet of parchment paper, which you can also grease.
Layer coconut and pecans
Next, let’s get to the heart of the earthquake cake recipe. This cake gets its name not just from its delightful eruption of flavors but also from the delicate layering technique.
- Add texture: Pour about 1 cup of flaked coconut evenly over the bottom of your prepared baking dish.
- Crunch factor: Follow that up by sprinkling 1 cup of chopped pecans on top of the coconut. These two ingredients create a beautiful base that complements the chocolate cake perfectly.
Prepare the chocolate cake mix
With the base established, it’s time to whip up the cake batter. You’ll need a box of chocolate cake mix (usually around 15.25 ounces). Yes, sometimes, a good box mix does the trick!
- Combine ingredients: In a large mixing bowl, prepare the mix as per the package directions, usually involving eggs, water, and vegetable oil.
- Mix well: Whisk until combined; be careful not to overmix. A few lumps are fine; they’ll bake out in the oven.
Pro tip: If you want to elevate your cake, you might consider adding a teaspoon of vanilla extract or a dash of espresso powder to enhance that chocolate flavor.
Pour the batter and create the cream cheese swirl
Now comes the fun part! Gently pour the prepared chocolate batter over the layers of coconut and pecans in your baking dish.
- Spread evenly: Use a spatula to make sure the batter covers every inch of the base.
Next, we’ll create that luscious cream cheese swirl.
- In a separate bowl, mix 8 ounces of cream cheese (softened), 1 cup of powdered sugar, and 1 teaspoon of vanilla extract. Blend until it’s creamy and smooth.
- Swirl it in: Drop spoonfuls of the cream cheese mixture on top of the batter. Use a knife to gently swirl it through the chocolate, creating a marbling effect.
Bake to perfection
Now that your cake is fully assembled, slide it into the preheated oven. Bake for 30-35 minutes or until a toothpick inserted in the center comes out clean.
- Check it: Keep an eye on your cake; every oven is different (the wonders of baking!). You want a nice, firm top with a gentle spring when touched.
- Cool down: Once baked, remove the cake from the oven and let it cool in the pan for about 10-15 minutes before transferring it to a wire rack to cool completely.
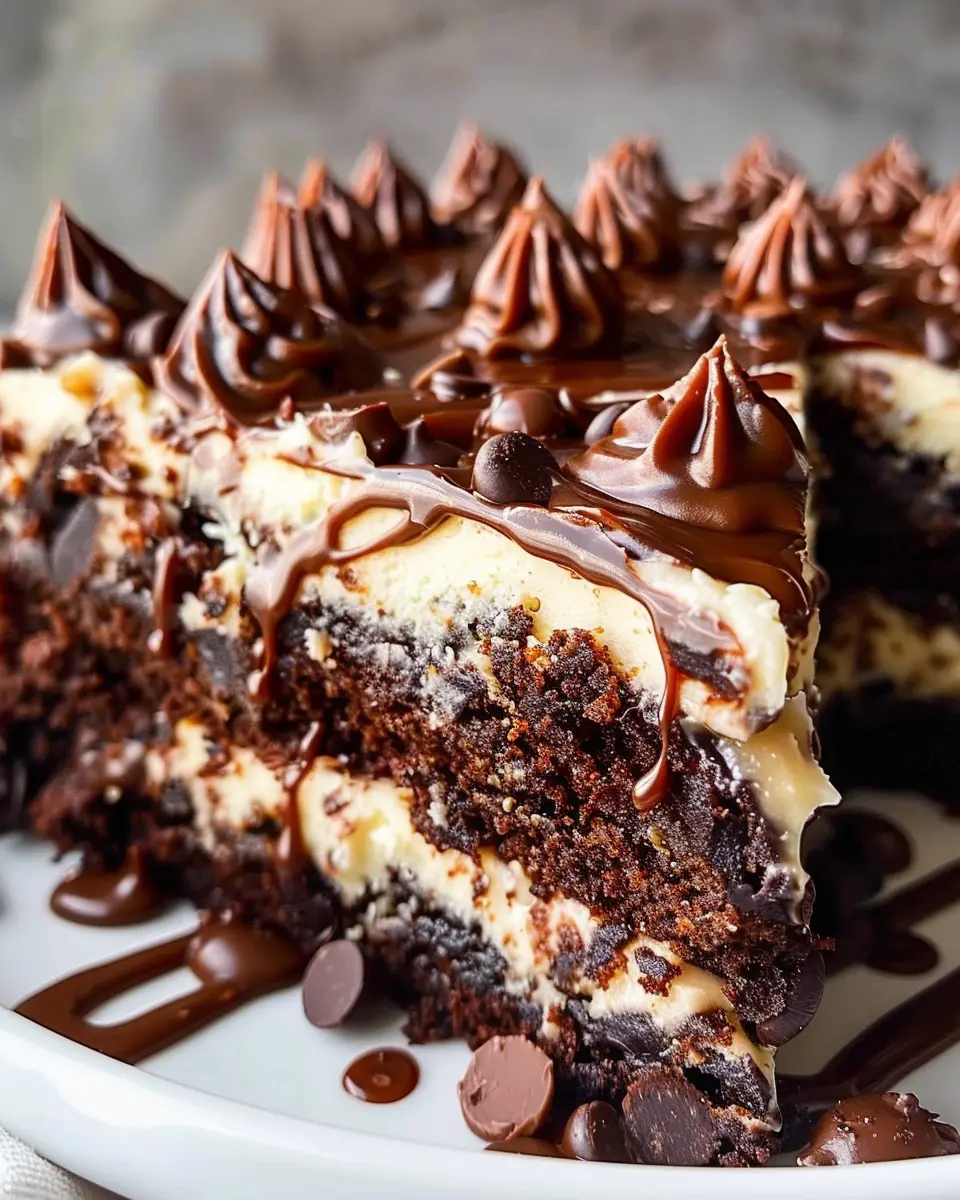
As it cools, the cream cheese mixture will “quake” through the cake, creating those beautiful cracks that give the Earthquake Cake its lovely appearance.
Now that you’ve navigated through this step-by-step process, you’re ready to enjoy a slice (or two) of this decadent treat. Feel free to serve it with a scoop of ice cream or drizzled with chocolate sauce for an extra indulgence. Happy baking!

Variations on Earthquake Cake
When you think about the classic earthquake cake recipe, it’s easy to get lost in the gooey goodness of chocolate and cream cheese. But why not mix it up? Here are a couple of fun variations that add a twist to this beloved dessert.
Chocolate Chip Variations
If you’re a chocolate lover, consider adding a cup of semi-sweet or dark chocolate chips to the cake batter. You can also experiment with different chocolate types, like white chocolate chips for a fun contrast. If you want to take your flavor game up a notch, drizzle some caramel sauce over the top before baking. The melted chocolate and caramel work together harmoniously, making each bite a delightful explosion of flavors. For even more texture, sprinkle chopped nuts like pecans or walnuts into your layers. This not only adds crunch but also elevates the cake’s overall richness.
Healthier Twists with Alternative Ingredients
Maybe you’re looking for a lighter version of the classic earthquake cake recipe. Swapping out regular flour for almond or oat flour can maintain the cake’s moistness while offering a nutty flavor boost. You can also replace sugar with natural sweeteners like maple syrup or agave nectar. Another great tip? Use Greek yogurt instead of cream cheese in the filling—you’ll still get that creamy texture with added protein.
If you’re keen on exploring other modifications, check out resources like Cooking Light or EatingWell for some healthier baking tips. Just remember, experimenting is part of the fun, so don’t hesitate to let your creative juices flow!
Cooking Tips and Notes for Earthquake Cake
Common pitfalls to avoid
When making an earthquake cake, it’s easy to run into a few hiccups. One common pitfall is overmixing the batter. This can lead to a denser cake rather than the lovely, gooey center we’re aiming for. Also, be cautious with baking time; removing the cake too early can result in an unbaked middle. So, keep an eye on those last few minutes!
Best practices for ensuring a gooey center
Achieving the perfect gooey center in your earthquake cake requires a little finesse. Here are some tips:
- Reduce the oven temperature slightly if you’re baking with a dark pan to ensure even cooking.
- Underbake just a touch; the cake will continue to set as it cools.
- Make sure to layer your filling evenly; this helps distribute flavors and gives that signature earthquake appearance when it settles.
For more insight on cake baking, check out resources like the American Cake Decorating website. Happy baking!
Serving Suggestions for Earthquake Cake
When you whip up a delicious earthquake cake, you’ll want to ensure it shines at the table. Here are some delightful serving suggestions to elevate your dessert experience!
Pairing with Ice Cream
What could be better than a warm slice of earthquake cake paired with a scoop of creamy ice cream? Vanilla or chocolate ice cream complements the rich flavors of the cake perfectly. You could even try a salted caramel or coffee ice cream for a more decadent twist. The contrast of hot cake and cold ice cream is simply irresistible!
Creative Garnishing Ideas
Don’t hesitate to get a bit creative with your garnishing! Here are some ideas to enhance the presentation:
- Chocolate Sauce Drizzle: A light drizzle adds a touch of elegance.
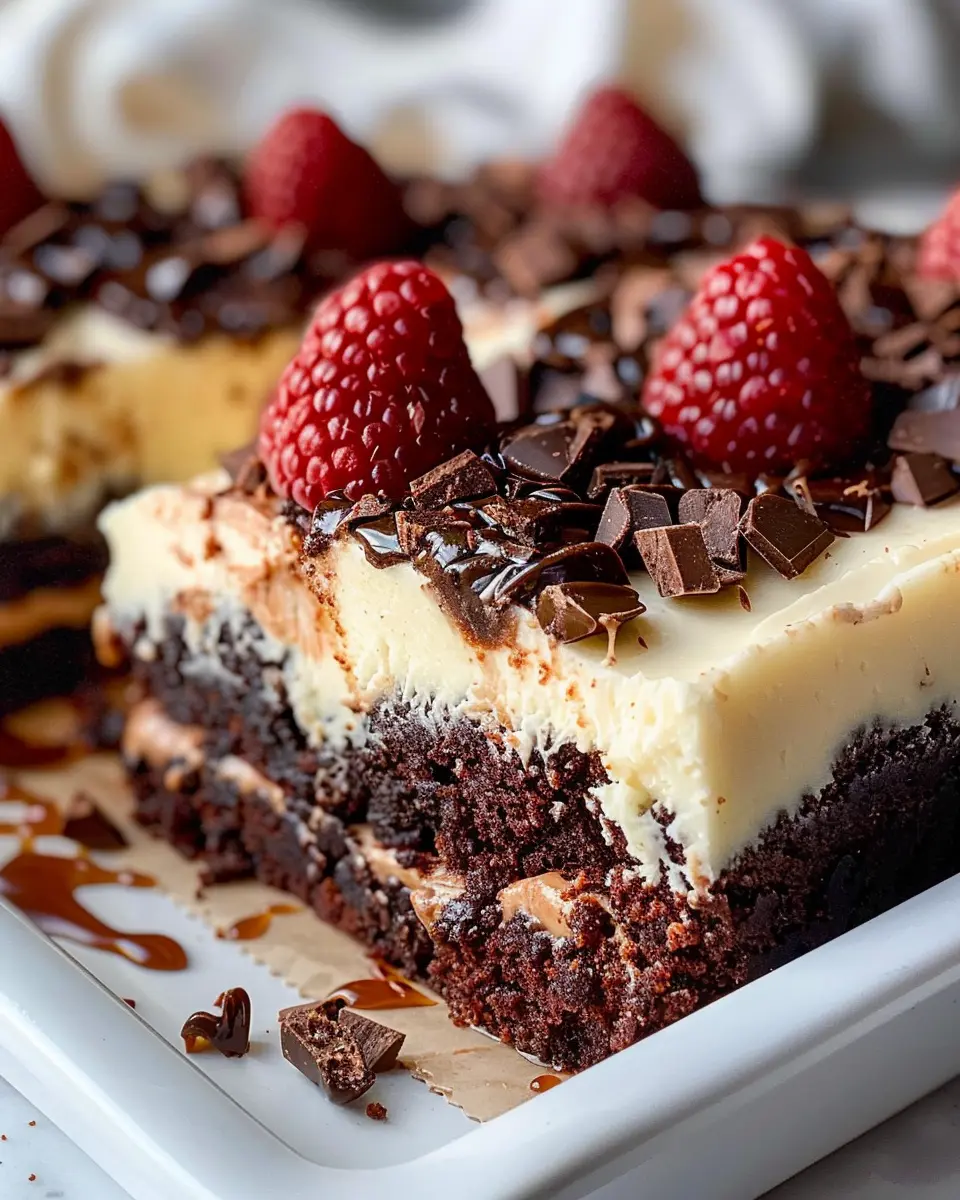
- Fresh Berries: Strawberries or raspberries provide a pop of color and a tangy counterpoint.
- Whipped Cream: A fluffy dollop can soften the cake’s richness.
- Chopped Nuts: Scatter some toasted walnuts or pecans to add crunch and extra flavor.
Feel free to mix and match these ideas to match your mood or the occasion! By serving your earthquake cake this way, you’ll impress your friends and family while indulging in a delightful dessert experience. Looking for more tips? Check out this guide on dessert pairings.
Time Breakdown for Earthquake Cake
Understanding the timing for each step of your earthquake cake recipe is crucial for perfect execution. Let’s break it down:
Preparation Time
Spend about 20–25 minutes getting everything ready. This includes gathering your ingredients, preheating the oven, and mixing the batter. If you’re like me and enjoy multitasking, use this time to enjoy a podcast or sip on a delicious coffee.
Baking Time
Once your batter is ready, pour it into the pan and let it bake for approximately 45–50 minutes. Keep an eye on it, as ovens can vary. A toothpick inserted in the center will be your best guide—if it comes out clean, it’s done!
Total Time
From start to finish, you’re looking at about 1 hour and 15 minutes to create this delectable dessert. Perfect for a cozy night in with friends or a sweet challenge for your next dinner party. Dive into this earthquake cake recipe, and please share your experience with us!
Nutritional Facts for Earthquake Cake
When indulging in the delightful Earthquake Cake, it’s helpful to know what you’re treating your taste buds to. This dessert, with its rich flavors and textures, brings a balance of indulgence and satisfaction.
Calories per serving
Each generous slice of Earthquake Cake packs approximately 400 calories. While this isn’t a low-calorie option, it’s important to remember that desserts are all about moderation and enjoyment. A little slice can be part of a balanced diet, especially when shared with friends at a gathering.
Sugar and fat content
The Earthquake Cake recipe does contain a decent amount of sugar and fat. Each serving may have around 30 grams of sugar and 20 grams of fat. Much of this comes from the cream cheese and other rich ingredients, which create that signature gooey texture. Consider pairing it with a fresh fruit salad to add some nutrients to your dessert game!
For those curious about dietary choices, insights can be found on sites like The American Heart Association regarding sugar intake. Remember, enjoying every bite guilt-free is all part of the experience!
FAQs about Earthquake Cake
How can I make my Earthquake Cake less sweet?
If you find that the earthquake cake recipe tends to lean on the sweeter side, you’re not alone! Here are some simple tips:
- Reduce sugar: Try cutting the sugar by about 25%. The chocolate and cream cheese provide plenty of sweetness.
- Use dark chocolate: Opt for dark chocolate instead of milk chocolate chips for a more balanced flavor.
- Add a hint of salt: A small pinch of salt can enhance flavors and counteract sweetness.
- Incorporate nuts: Adding walnuts or pecans not only gives a yummy crunch but also helps balance the sweetness.
Can I prepare the cake in advance?
Absolutely! The earthquake cake is perfect for prepping ahead of time:
- Baking: You can bake the cake a day or two before your event. Just let it cool completely before storing it.
- Frosting: If you’d like to frost it, consider doing so just before serving to keep the texture fresh.
Prepping in advance is also a smart way to save time while ensuring you enjoy your gathering!
What’s the best way to store leftovers?
Storing your delicious earthquake cake properly can help maintain its mouthwatering goodness:
- Place any leftovers in an airtight container at room temperature for up to three days.
- If you desire even longer storage, wrap individual slices in plastic wrap and place them in the freezer. They can last up to three months!
- Just thaw it at room temperature or in the fridge when you’re ready for a slice.
For additional tips and variations, check out resources from Epicurious or Bon Appétit. Happy baking!
Conclusion on Earthquake Cake
Why you should try this recipe today!
There’s something captivating about the earthquake cake recipe—the delightful blend of chocolate, cream cheese, and nuts all coming together to create a treat that’s as fun to eat as it is to make. If you’re looking for an easy dessert that impresses without requiring hours of slaving in the kitchen, this is it! Not only is it perfect for gatherings, but it’s also a great way to indulge yourself on a cozy night in.
Now, think about those moments when you need a sweet fix or want to treat friends over coffee. Why not surprise them with a slice of this luscious cake? It’s more than just dessert; it’s an experience. So grab your ingredients, and let’s get baking! Looking for more delicious recipes? Check out AllRecipes for some fresh ideas.
Print
Earthquake Cake Recipe: The Indulgent Treat You’ll Love to Make
- Total Time: 55 minutes
- Yield: 12 servings 1x
- Diet: Vegetarian
Description
Discover how to make an indulgent Earthquake Cake that combines rich flavors and textures for a delightful dessert experience.
Ingredients
- 1 cup chopped nuts
- 1 cup shredded coconut
- 1 box (16 oz) chocolate cake mix
- 1 cup water
- 1/2 cup vegetable oil
- 3 large eggs
- 8 oz cream cheese
- 1 cup powdered sugar
- 1 cup chocolate chips
Instructions
- Preheat the oven to 350°F (175°C).
- Sprinkle chopped nuts and shredded coconut at the bottom of a greased baking pan.
- In a bowl, mix the cake mix, water, oil, and eggs until smooth.
- Pour the cake mixture over the nuts and coconut.
- In another bowl, beat together the cream cheese and powdered sugar until creamy.
- Drop spoonfuls of the cream cheese mixture over the cake batter.
- Sprinkle chocolate chips on top of the batter.
- Bake for 30-35 minutes or until a toothpick comes out clean.
Notes
- Try adding different nuts for variation.
- Serve warm with whipped cream for additional indulgence.
- Prep Time: 20 minutes
- Cook Time: 35 minutes
- Category: Dessert
- Method: Baking
- Cuisine: American
Nutrition
- Serving Size: 1 slice
- Calories: 350
- Sugar: 30g
- Sodium: 250mg
- Fat: 18g
- Saturated Fat: 8g
- Unsaturated Fat: 6g
- Trans Fat: 0g
- Carbohydrates: 45g
- Fiber: 2g
- Protein: 5g
- Cholesterol: 50mg
Keywords: Earthquake Cake, dessert, chocolate, cake recipe